If you want to find out everything about food dehydration, read on, and you will be amazed by how easy and healthy it is.
In the last several years, food dehydration became very popular. Instead of freezing food, people opt to dehydrate it to get more nutrients.
But why is dehydrated food so good? Well, it’s usually food that people grow themselves, and they also prepare it as well. It’s an inexpensive way of preserving healthy food for your family, and it also gives you the satisfaction of being self-sufficient. There are tons of ways you could dry and preserve your food. Each of them has benefits and downsides, and you can even combine more techniques to create something really special.
Most people preserve their foods in cans or freezers. That’s fine, but freezing it takes a lot of space, and so does canning. You’ll have to clear an entire storage room to have enough space to put everything in. The other problem is that most of these foods come in breakable packaging, and the food can spoil if it’s not kept in ideal conditions. Drying, or dehydrating food is one of the best ways to preserve it for a long time, and here’s why:
It’s super easy
It’s not expensive
It’s easy to store
It takes up little space
It’s easy to eat
It’s very nutritious
When you remove water from food, it loses weight and becomes a dried “superfood” that has more flavor and nutrients than fresh food. You will lose some nutrients upon preservation, or if you decide to cook them. When you dehydrate food, it loses some of its vitamins A and C, and veggies lose the most nutrients because of the blanching process. Some experts claim that dried food is healthier than canned or frozen food because the vitamins and minerals are in higher concentration. You can actually eat less and get more nutrients this way.
It’s highly versatile
What Is Food Dehydration?
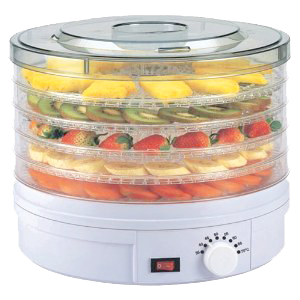
The process of food dehydration is in other words, food drying. During this process, the food loses moisture through evaporation. When the moisture is gone, so are the microorganisms that spoil food over time. When you storage dried foods, the bacteria and microorganisms can’t grow so you can preserve it for a long time.
Food dehydration is really a simple process that anyone can do. All you need is some warm air that pulls the moisture out of the food.
Food Drying Principles
When you want to dry your food, these are the principles you have to stick by to get the best results.
Preparation
2. Cut the fruit to the desired shape for serving. For example, you can cut apples into slices or rings before the drying process.
3. Cut the pieces to the same size and the same thickness to dry them evenly. Slices that are between 1/8 and 1/4 inches will dry quicker than thicker slices.
4. Some foods need to be washed before the drying process. Foods like berries, herbs, and seedless grapes all need washing before you dehydrate them.
5. Do this to prevent browning: you can steam or coat light-colored fruit with lemon juice. The acids will protect the coloring. Some vegetables need to be blanched to dry well.
During the Drying Process
2. Maintain a temperature of about 140F and make sure that the air circulates. You have to remove moisture as quickly as you can to prevent the food from spoiling. The temperature needs to be about 140F for the moisture to evaporate without affecting the color, texture, nutritive value, or the flavor of the food. If you don’t have enough heat and air circulation, the food can be affected by various bacteria and microorganisms that will make them unfit for consumption. If you have too much heat and not enough humidity, you could lose all the nutrients. Either that or the food’s outer surface becomes too hard which prevents the moisture to evaporate.
3. Knowing when the food is dry. When the food becomes leathery, or brittle, you know that it’s dry. Vegetables are drier than fruit and you don’t need to condition them at all.
After the Drying Is Done
2. Fruit conditioning. Place the dried, cooled fruit into glass jars or plastic containers for the conditioning process.
3. Seal your containers and wait for ten days. This is a crucial part of the process. The excess moisture from some pieces will be absorbed by the pieces that are dryer.
4. Shake the jar every day to separate the pieces. Do this to even out the moisture. If you see any condensation on the jar, put the fruit back into the dehydrator for further drying.
5. When the fruit is ready, you can package and store it.
Packaging of Dried Foods
2. Get the right packaging. You can use anything from Ziploc bags, metal containers, plastic containers, glass jars, pretty much anything that has a tight lid. You have to keep the moisture out of the package once it’s full.
3. Don’t use metal containers with sulfured dried fruit. If you have only metal containers, place the dried, sulfured fruit into plastic bags first. Sulfur reacts with metals, and the dried fruit can change color.
4. Pack the containers as tightly as you can, but don’t crush them.
5. Pack only the amount of food you will use in the recipe you plan on using. When you open a package, the contents are exposed to moisture and air, which will lower their quality. Once you open a package, use everything inside.
Storing Dried Fruit
2. Use the food you opened within 12 hours to get the best quality.
3. Check your stored dried fruit from time to time to see if they are in fact dry. Even though the food you put in a package looks like it’s completely dry, it can spoil if it absorbs moisture. If your containers aren’t completely sealed, moisture can get in and spoil the contents. If you see any signs of moisture, change the packaging right away. If you see mold, you’ll have to throw it away.
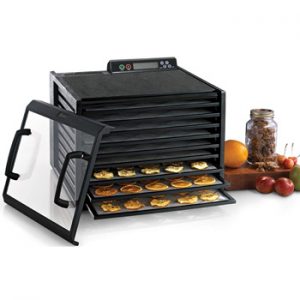
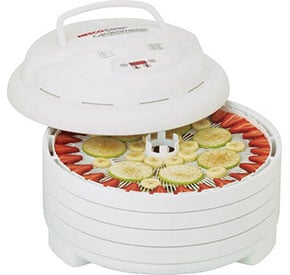
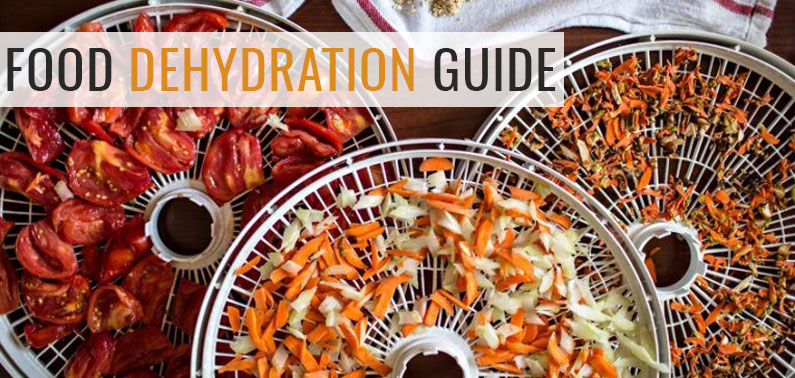
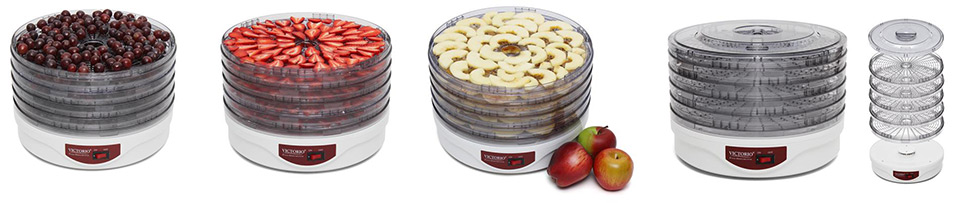
Here are the most popular techniques of food dehydration you can quickly master at home.
Fruit

The citrus bath is a technique that’s used to prepare fruit for the dehydration process. The acids from lemons prevent browning of the fruit while it dries. The entire process is simple; anyone can do it.
First, you have to clean all the fruit and cut it into slices that are about the same size. Then, mix lemon juice with water with the ratio 4 to 1. You can also use pineapple and lime juice. Now, when you have prepared the bath, place the sliced fruit inside and wait for 5 minutes. The preparation is now finished.
The next step is to set the temperature of your dehydrator to 140F and place the fruit inside. Keep in mind that fruit with lots of water, like bananas, tomatoes, lemons and others take more time to dry because they contain more water than other food. The estimated drying time is about 10 hours. You can also mix the fruit with vegetables in a blender and then pour the mixture over a plastic wrap. Put it in the dehydrator set to 110F, and you will get a soft fruit leather coating in under two hours. You can later use these ingredients to spice things up in the kitchen.
Vegetables

Meat
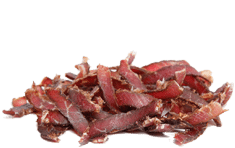
Drying meat in the dehydrator is also possible, but you’ll have to spend a bit more time preparing it. Before putting it to dry, you have to cut the meat and make meat jerky. The good news is that meat dries much quicker than fruit and veggies.
Once the meat is cut, get your favorite marinade and pour it over every piece separately rather than soaking the pieces in the mixture. When you covered all the pieces, leave them in a glass dish to soak the flavor for about 12 hours. Set the dehydrator to 150F and put the marinated meat jerky inside. Leave it there for 4 hours, and you’ll have the best dried meat jerky you ever tasted.
Herbs