History of Jerky
Jerky is an ancient process of preservation of meat. The word is originated from the South American ancient language named Quechua. It is a process of drying meat at low temperatures and also adding salt to prevent bacterial growth.
What is fish Jerky?
Fish Jerky is dried out, protein-dense and lean fish meat. It is cut to strips and dried out so that all the moisture gets evaporated which ensures longer shelf life without a need for refrigeration. Being light in weight after drying, makes it the perfect choice among ready-to-eat snack options.
Types of Jerky
Jerky is mainly salty and savory in taste but for those who don’t like the harsh saltiness, sweet Jerky using Maple Syrup or Honey is there also.
Why Fish Jerky is a great food choice
Not only at home but if you are stuck in wilderness with limited resources then this food can turn out to be life-saving for you. The reasons are:
- Long-lasting: It lasts for months in a vacuumed state even without the fridge.
- Easy to make: It doesn’t contain a lot of fancy spices and all you need is the necessary skill.
- Rich in nutrients: It is a great source of protein and Omega 3, which helps you sustain for long.
Preparing Fish Jerky at Home in 6 Steps
You can follow the below-given steps to make fish jerky at a comfort of your home. This is a highly nutritious snack to casually eat or take to a backpacking trip.
Step 1: Choosing the Right Fish
The first thing to keep in mind that you never use pre-cooked meat; it should always be raw. Only then the moisture from the meat can be removed otherwise the chance of spoiling increases.
Second thing is, even though any fish can be used to make Jerky but don’t forget one thing, lean fish will take less time to dry and it will last longer than the fattier fish.
Low-fat lean fish like Cod, Halibut, Pike, Bass should be your preference but that doesn’t mean Catfish, Salmon, Tuna, etc. can’t be used instead. We made a whole article on making salmon jerky alone, check it out!
Step 2: Cleaning and cutting the fish properly
The first thing you would need is a sharp knife and then start by removing the nonedible parts like the head and intestines. Then remove bones and excess wastes. These parts are most likely to be contaminated by bacteria that cause the Jerky to spoil faster.
Use boiled water while washing the fish; it helps to remove excess lake and ocean water filled with bacteria.
The cutting process for small and large fish is different. Let’s see how to do that.
- Small Fish: Small fish that is less thick than 1 inch can be used as a whole piece just by cutting it and taking the intestines and bones out.
- Large fish: These fishes are to be filleted properly and into smaller pieces otherwise, it won’t get dried evenly.
Step 3: Brine the fish if possible
Brining is the process of soaking fish fillets into the saltwater solution. Salt has been used as a preservative for thousands of years which helped to inhibit bacteria to protect it from spoiling.
The solution is made by adding salt to boiling water until it stops dissolving. The ideal ratio would be 6:1. In this process, make sure to use iodine-free salt only for the best possible result. And then soak the fish for around an hour and then start the process of drying it out.
Step 4: Hang the fish to dry out
The most efficient to preserve food is to remove moisture from it and all the methods of preservations follow the same rule to remove excess water in one way or another. So, no bacteria can live and cause decay on the food.
Now in case of fish jerky, after brining the fish, make sure to remove the water as much as possible. Then keep it hanging for further drying. Now you can do that in 3 ways.
- Air Drying: The easiest and most convenient way is Air Drying. Simply hang your meat to circulate air around it. But in case of cold or dry weather, this method might not be the best bet for you.
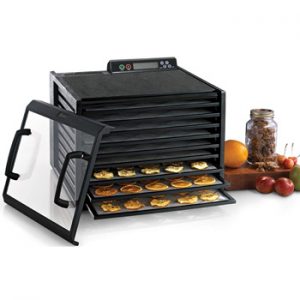
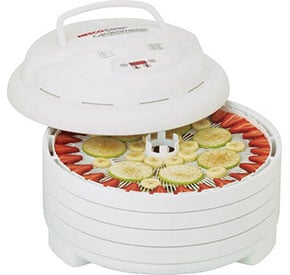
- Heat Drying: Keeping the meat near the fire, allows it to dry up quickly and it’s the only way you can dry your meat in case of inadequate air supply. But make sure that don’t heat up too much that it gets cooked. A great alternative to fire would be a dehydrator made for jerky! It’s a combination of method 1 & 2 (hot air circulation).
- Smoking: The traditional way of drying and it produces the tastiest Jerky. The process can be divided into two ways. One is Cold Smoking and another one is Hot Smoking. You can eat Hot smoked fish without further preservations.
Step 5: Keep an eye on it
Keep on flipping the fish so that you get evenly textured Jerky. The 3 most important things for a great Jerky are a lot of sunlight, warm air, and low humidity. If these 3 factors are present then you get the best quality Jerky at your home.
Step 6: Store for long use
Store it in a tight container and ideally in a cooler place for longer shelf life, but before that always cool down the meat as it might stay warm due to dehydrating process.
Bonus Tips
You can add spices and herbs for flavoring. If you think it’s way too salty then water is the solution, soak them up in normal water and then dry again to balance it. Always try to use fresh and lean fish. And to help with cutting you can refrigerate the fish for a few hours.

Conclusion
Jerky is a very useful option to have if you want a long-lasting yet simple food item. Make sure you make thin slices, be generous with the salt, and give it some time. You will get a chewy, delicious treat. It is a pretty cool skill you can master which allows you to make healthy sustainable food with very little resources.