Our Guide To Dry Herbs In a Dehydrator
Summer is everyone’s favorite time of the year because of the beautiful weather and the green that’s all around us. The days are longer and warmer, and the plants love that. They grow, bloom, you can hear the buzzing of the bees everywhere around you, but soon enough, winter comes back and everything disappears until the next summer.

All of the food that comes in the summer has to be stored appropriately to be used for the entire year. Getting a food dehydrator can help you prepare food for storage as it dries them of water.

The cave people also used to prepare their food for each winter. They smoked and dried it, so they could use it throughout the entire winter when food is not that easy to get. Some herbs that were used as medicine or as spices were dried and used all year round, so they would never run out of them.

In our recent history, herbs were usually dried at home in attics and kitchens. You probably remember your grandma drying out linden on the kitchen table. The problem with this technique is that it requires a lot of space and the drying time is too long. Furthermore, if you live in an area with high humidity, you will have a difficult time drying out herbs without getting mildew and mold on them. That’s why a dehydrator is an excellent choice.

It speeds up the process significantly; you just have to know how to use it right to make sure you keep the nutrients in the plants you are drying. You need to control the temperature and keep it the same, which is why it’s hard to dry herbs in a standard conventional oven. Without further a due, let’s see how you should dry herbs in a dehydrator.

The Preparation


Like we mentioned before, drying herbs in a dehydrator is far easier and quicker than doing it the old fashion way.This machine can dry all of your herbs in three to four hours while air-drying them takes up to a month (depending on the climate where you live).

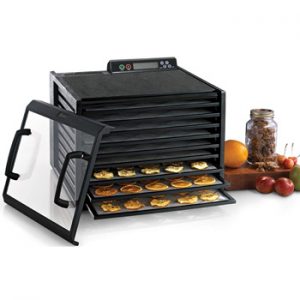
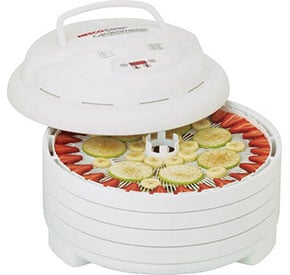
The dehydrator dries your herbs, all you have to do is take it out and store it in a glass or plastic jar. Dehydrators usually have 4 or 6 trays, and that lets you dry different herbs at the same time without the flavors mixing.

Make sure that you remove all of the surface moisture on the plants before putting them into the dehydrator. You can set small leaves with the stems inside, but make sure you clip them off when you’re done. If you want to dry roots, you will have to clean them and remove their outer layer. Then, slice each root to into smaller pieces (1/2 inches) and make sure they are all similar in size.

You will know that they are dried once they become hard and that usually takes up to ten hours. Roots typically have a strong aroma when drying so dry them in a garage or somewhere where the smell won’t bother you.

herbal tea

The Drying


If you are drying herbs with the stamp, make sure that the stamp is no longer than an inch because it affects drying time. If the leaves of the herb you want to dry are large enough not to fall through the holes in the trays found in the dehydrator, take them off the stems. The air temperature inside of the dehydrator and the amount of water found in the herbs both affect on the drying time.
When the drying process starts, you should check on the progress every half an hour or so because you can’t let the herbs dry for longer than they should. The temperature on the thermostat should be anywhere between 95 and 115F. The drying time depends on the herb so keep your eye on the progress.
Place the herbs on the trays and leave some space between them so the air can circulate around them. You can put different herbs together, but avoid doing that if possible because the flavors can mix and you don’t want that to happen. You will know that the herbs are dry when they crumble between your fingers.
You can make sure that you don’t overdry your herbs by setting the dehydrator to stop working after 3 hours so you can check the progress. Most spice herbs will be dry after this time, but some others require more time. The dehydration process is an excellent way of storing food because you rid it of water while keeping the good stuff and the flavor.

The Storing


dried herbs in a jar
All of the dehydrating and careful planning you did up to this point means nothing if you don’t store the dried herbs correctly. Take the leaves out of the dehydrator and put them in a large glass jar that has a tight lid. If you don’t do that, moisture will find its way inside, and your herbs will become useless.

The enzymes found in dried herbs are concentrated, and they are four times as strong than in fresh herbs. The jars with herbs should be stored in a dark place and they should keep the contents fresh for as much as two years.

dried herbs in a jar

Conclusion


Dehydrators are a great device to have at home because they can turn your fresh food into dry food that has a much longer expiration date. Food dehydrators give you control and flexibility, so you know that you’ll have all the food you need even in the middle of the winter.

Drying herbs are the easiest of all food types. You can dry your entire garden in a couple of days so you’ll have all the spices and herbs for the next period. There are only a couple of things to remember: clean your herbs and cut them into similar pieces before putting them in the dehydrator. When they are done, put them in glass jars with tight lids, and you’ll be fine.